Effective Methods for Cleaning Grout
Grout is an essential part of tiled surfaces, but it can be a magnet for dirt, stains, and mold. Keeping grout clean not only enhances the appearance of your tiles but also extends their lifespan. Here are some effective methods for cleaning grout that will help you maintain a sparkling and hygienic home.
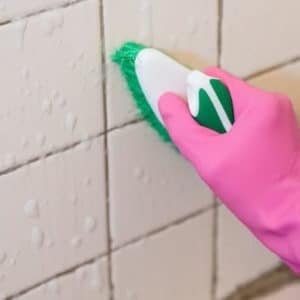
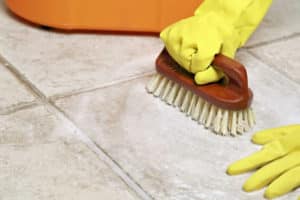
1. Warm Water and a Brush
Sometimes, the simplest solutions are the best. For light cleaning, use warm water and a medium-bristle brush to scrub the grout lines. This method is effective for removing surface dirt and grime. Make sure to rinse the area with clean water afterward to avoid leaving any residue.
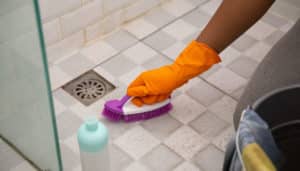
2. Vinegar and Water Solution
A mixture of equal parts vinegar and warm water can be a powerful cleaning agent for grout. Spray the solution onto the grout lines and let it sit for about five minutes. Then, scrub with a brush and rinse with water. Vinegar is a natural disinfectant and can help remove mild stains and buildup.
3. Baking Soda Paste
For tougher stains, make a paste using baking soda and water. Apply the paste to the grout lines and spray with vinegar. The mixture will bubble and fizz, helping to lift dirt and stains. After the bubbling stops, scrub the grout with a brush and rinse thoroughly with water.
4. Hydrogen Peroxide
Hydrogen peroxide is another effective cleaner for grout. You can use it alone or mix it with baking soda to form a paste. Apply the hydrogen peroxide or paste to the grout lines, let it sit for a few minutes, and then scrub with a brush. Rinse well with water to remove any residue.
5. Oxygen Bleach
Oxygen bleach is a powerful cleaner that is safe for most types of grout. Mix the oxygen bleach with water according to the package instructions and apply it to the grout lines. Let it sit for up to 15 minutes, then scrub and rinse with water. Oxygen bleach is effective at removing tough stains and brightening grout.
6. Commercial Grout Cleaners
There are many commercial grout cleaners available that are specifically formulated to tackle tough grout stains. Follow the instructions on the product label for the best results. These cleaners often contain strong chemicals, so be sure to use them in a well-ventilated area and wear protective gloves.
7. Steam Cleaning
Steam cleaning is an eco-friendly and effective method for cleaning grout. A steam cleaner uses high-temperature steam to loosen dirt and kill bacteria and mold. This method is particularly useful for large areas or heavily soiled grout. After steam cleaning, wipe the area with a clean cloth to remove any remaining dirt.
8. Preventive Maintenance
Regular maintenance can help keep your grout looking clean and new. Seal your grout lines every six months to a year to protect them from stains and moisture. Additionally, clean up spills immediately and use a doormat to reduce the amount of dirt tracked onto tiled floors.
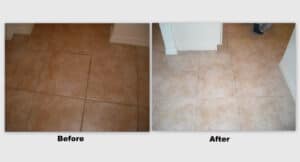
When to Call a Professional
While these methods are effective for routine cleaning, there are times when professional help is needed. If your grout is severely stained, damaged, or moldy, it’s best to call in the experts. Professional grout cleaning services use specialized equipment and techniques to restore your grout to its original condition.
For residents of Southwest Florida, My Dirty Grout offers professional grout cleaning services that can tackle even the toughest stains. Our experienced technicians use advanced cleaning methods to ensure your grout looks its best. Visit our website at mydirtygrout.com or call us at (941) 457-4197 to schedule an appointment.
Conclusion
Keeping your grout clean is essential for maintaining the beauty and hygiene of your tiled surfaces. By using these effective cleaning methods, you can tackle dirt, stains, and mold with ease. Remember, regular maintenance and prompt cleaning are key to preventing grout from becoming a problem. If you need professional assistance, don’t hesitate to contact My Dirty Grout for expert grout cleaning services. Your tiles will thank you!