If you have tile and grout in your home, you may be wondering how often you should clean it to keep it looking fresh and new. The answer may vary depending on factors such as foot traffic, pets, and type of tile. However, a general rule of thumb is to clean your tile and grout at least once every 6-12 months.
Cleaning your tile and grout regularly not only helps maintain the beauty of your floors but also prolongs their lifespan. Over time, dirt, grime, and bacteria can build up in the pores of your grout lines, causing discoloration and even mold growth if left untreated.
My Dirty Grout
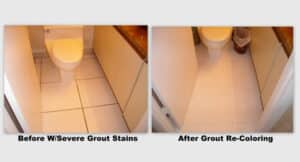
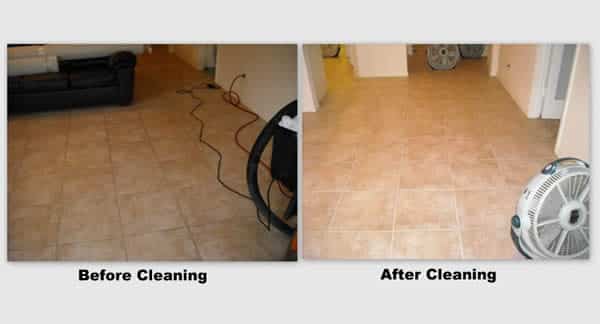
One company that specializes in professional tile and grout cleaning is My Dirty Grout. They serve Lee and Charlotte Counties, providing top-notch services to ensure that your floors look brand new again. Their website at https://www.mydirtygrout.com showcases before-and-after photos that demonstrate the effectiveness of their cleaning process.
My Dirty Grout can be reached at (941) 457-4197 for a free estimate on their services. Whether you have ceramic, porcelain, or natural stone tiles, they have the expertise to clean them thoroughly without causing any damage.
So if you’re looking to refresh the look of your tile and grout floors, consider contacting My Dirty Grout for professional cleaning services. With regular maintenance from experts like them, you can enjoy beautiful floors for years to come.
Tile and grout are common features in most homes, adding both aesthetics and functionality to the space. However, over time, these surfaces can become dirty and dull due to foot traffic, spills, and other factors. Regular maintenance is necessary to keep your tile and grout looking clean and shiny. While there are many commercial cleaning products available in the market, they often contain harsh chemicals that can be harmful to you and your family’s health.
If you’re looking for natural ways to clean your tile and grout without using chemical-laden products, look no further than Dirty Grout. A professional cleaning company serving Port Charlotte, Fort Myers, Cape Coral, Bonita Springs (and all surrounding areas), Dirty Grout specializes in removing dirt, bacteria, mold, and stains from tile surfaces using eco-friendly methods.
Here are some natural ways recommended by the experts at Dirty Grout to help you achieve a spotless tile surface:
Baking Soda Baking soda is not only a staple ingredient in every household but also an excellent cleaner for tiles. Its abrasive nature makes it perfect for removing tough stains on tiles while being gentle enough not to damage them. Mix equal parts of baking soda with warm water until you get a paste-like consistency. Apply it on the affected area using a scrub brush or toothbrush for grout lines. Let it sit for 10-15 minutes before scrubbing again with warm water and then wiping it off.
Vinegar Vinegar has strong acidic properties that make it an effective cleaning agent against grease build-up on tiled surfaces like kitchen backsplashes or bathrooms walls. You can mix one-part vinegar with two parts of water in a spray bottle; spray it onto the desired area; let it sit for 5-10 minutes before wiping away with a damp cloth or sponge.
3. Understanding Teas TREE Oil Trisodium Phosphate(TSP) Treating tile and grout with tea tree oil is a natural way to clean and disinfect the surface. Tea tree oil has antibacterial and antifungal properties that can effectively kill germs and mildew on your tiles. Mix 5-10 drops of tea tree oil with water in a spray bottle, generously spray onto the affected surface, let it sit for 10-15 minutes, then scrub and rinse with warm water.
Lemon Juice Lemons are well-known for their natural cleaning abilities due to their high acidity levels. They work great in removing stubborn stains such as rust or hard water deposits on tiles or grout lines. Cut a lemon in half, dip it in salt (for added abrasiveness), then scrub the area until the stain disappears. Rinse off with warm water afterwards.
5. Trisodium Phosphate(TSP) TSP is known for its strong cleaning capabilities when dealing with tough stains on non-porous surfaces like tile and grout. It’s important to note that TSP should be handled carefully using gloves as it can irritate skin on contact. Mix one tablespoon of TSP with three tablespoons of warm water; apply this solution onto the desired area using a sponge or cloth, scrub gently before rinsing off thoroughly.
In addition to these natural methods mentioned above, Dirty Grout also recommends regular sweeping or vacuuming of tiled floors to prevent dirt from settling into the grout lines.
However, if you’re facing more stubborn stains or want professional help in making your tiled surfaces look like new again, contact Dirty Grout at (941) 457-4197 for an eco-friendly deep cleaning service at an affordable price point.
To sum it up, keeping your tile and grout clean doesn’t have to involve harsh chemicals that can be harmful to you and your family’s health. By using some kitchen staples like baking soda or vinegar along with natural cleaning products such as tea tree oil and TSP, you can achieve a sparkling clean tile and grout surface without compromising on your health. And for more stubborn stains or deep cleaning needs, don’t hesitate to call Dirty Grout – the experts in eco-friendly tile and grout cleaning.
Tile floors are a popular choice for many homeowners because of their beauty, durability, and ease of maintenance. But, like any flooring material, tile floors need to be cared for properly in order to keep them looking their best.
Here are 5 tips to help you protect your tile floors:
1. Regularly sweep and mop your tile floors. Regular sweeping and mopping can help keep dirt and debris from accumulating on your tile floors, which can cause scratching and staining. Be sure to use a mild cleaning solution and a soft mop or brush to avoid damaging your tile floor.
2. Place area rugs in high-traffic areas. Area rugs can help protect your tile floors from scratches and wear and tear. Place area rugs in entryways, hallways, and other high-traffic areas of your home.
3. Use furniture protectors. Furniture protectors are small pieces of plastic or rubber that you can place under furniture legs to protect your tile floors from scratches and other damage.
4. Invest in tile sealant. Tile sealant can help in protecting your tile floors from moisture, stains, and dirt. Be sure to reapply the sealant every few years to ensure your tile floors are properly protected.
5. Clean up spills immediately. Spills can cause staining and damage to your tile floors, so it’s important to clean them up immediately. Use a damp cloth or paper towel to wipe up spills as soon as they occur. Following these tips can help you protect your tile floors and keep them looking their best for years to come.
If you want to refresh the look of your floors and make them look nearly new again, contact My Dirty Grout for a quote to clean and color seal your grout.
There’s nothing more annoying than spending hours mopping a tiled floor only for it to have streaks afterward. The main reason there are streaks after mopping is residual dirt and dust. Moreover, an incorrect mopping technique also ruins the appearance of your floor.
Surprisingly, tile cleaning is trickier than some other cleaning tasks. To maintain your flooring, you must keep mob them correctly to avoid streaks and scratches.
Read on to find the best techniques for mopping to avoid streaking on tiled floors.
Techniques To Avoid Streaks on Tile
Here is a list of all the steps you need to follow to get streak-free floors:
Step 1
Take a hard floor attachment of a vacuum cleaner or a broom and sweep the floor thoroughly. Remove any traces of dirt and dust with more focus around the edges.
Step 2
Depending on the type of flooring material, choose a suitable cleaning agent. For linoleum and rubber tiles, use a mild cleaning agent.
For brick, ceramic, or stone, consider using a mix of hot water and vinegar. Vegetable oil and vinegar are excellent options for wooden tiles. You can also use a commercial-grade floor cleaner for other material types.
Once you have selected the cleaning agent, dip your mop and squeeze it out till all the excess liquid is removed. Start mopping the floor with the damp mop. You can also spray the solution directly onto the floor and mop on top of it.
Step 3
Replace the cleaning solution as soon as it starts to look dirty. If you continue using the dirty solution, it will cause streaks after mopping.
Step 4
Once you’re done, mop the floor once again but use clean water this time. It will remove any cleaning agent residue, leaving your floor sparkly clean. But if you have wooden floors, you can skip this step.
Step 5
After mopping the floor with clear water, dry it with a towel. Don’t wait for the floor to dry on its own, as it can leave marks.
If you’re working in a large space, consider mopping in sections. After mopping each section, dry it completely with a towel before moving to the next portion.
Hire a Professional
If you want to avoid the hassle of cleaning floors vigorously every time, consider getting them cleaned by professionals. A professional cleaning company will have all the equipment and supplies needed for the best results.
Dirty Grout is one of the best grout and tile cleaning companies that offer commercial and residential services. Get in touch today by calling us at (941) 457-4197 to get a free quote.
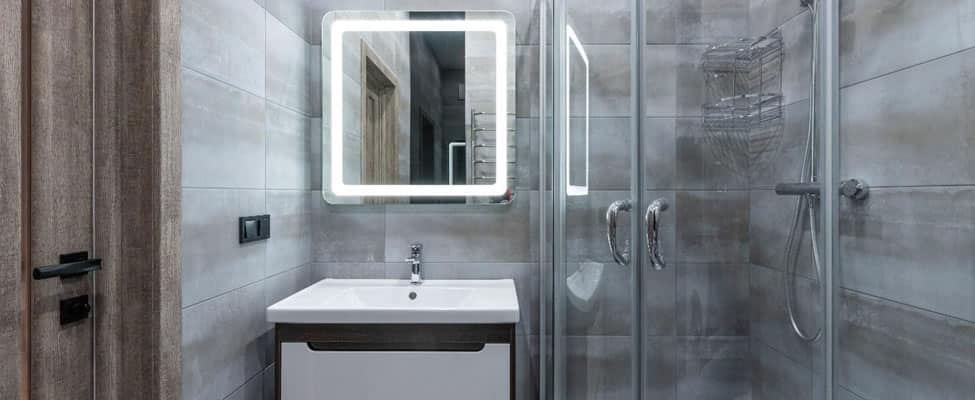
Shower leakages aren’t an uncommon occurrence. Improper grout application leads to water seeping through grout in areas that use water, such as your kitchen or bathroom. When it comes to bathrooms, your shower area is the most susceptible to grout failure.
What Causes Water Seeping Through Grout?
If your grout is cracking or applied unevenly, you’ll end up with water seeping through the tiles. Water seepage is most a result of unsealed grout.
Unsealed grout will lead to stagnant water, which ultimately causes the growth of mold and mildew between your tiles. This affects the overall appearance of your tiles, and in cases of severe damage, you might have to replace your tiles entirely.
How to Fix Water Seeping Through Your Shower?
A simple solution to prevent water seepage through your tiles is grout sealing. Unsealed grout can get dirty quite quickly, and with continuous use of water, it can damage your tiles.
But grout sealing will make your tiles waterproof and also enhance the overall appearance of your bathroom. When your tiles are waterproof, it automatically prevents water seepage. As a result, protecting them from severe water damage.
How Long Does Grout Sealing Last?
Grout sealing lasts for a maximum of two years. You’ll have to get your grout resealed every 1-2 years to maintain them and prevent water seepage.
DIY vs. Professional Grout Sealing
Grout sealing seems like a relatively simple task and many people consider taking it on as a DIY project. While that may seem like a cost-effective option, it can end up costing you more in the long run. In addition, grout cleaning needs to be done correctly for it to be effective. For that, you’ll need to use proper equipment and sealants.
It’s better to get professional grout sealing done to prevent water seepage. A job done by a professional will give better and long-lasting results. Plus, professional grout sealing is relatively inexpensive. Furthermore, by investing in it, you’ll be able to save yourself the trouble of getting your tiles replaced because of water seepage.
Hire Help
While plenty of companies would take on a grout sealing project, it’s important to hire help from a reliable contractor.
We recommend trying out Dirty Grout to get your grout sealed. We offer odorless grout sealing at affordable rates. Their team of experts has been in the grout sealing business for years and knows how to produce long-lasting results.
Final Thoughts
Grout sealing is an easy solution to fix water seeping in your shower area. It’s better to get your grout sealed by a professional. To keep your tiles in top condition and prevent water damage, be sure to get your grout resealed regularly.
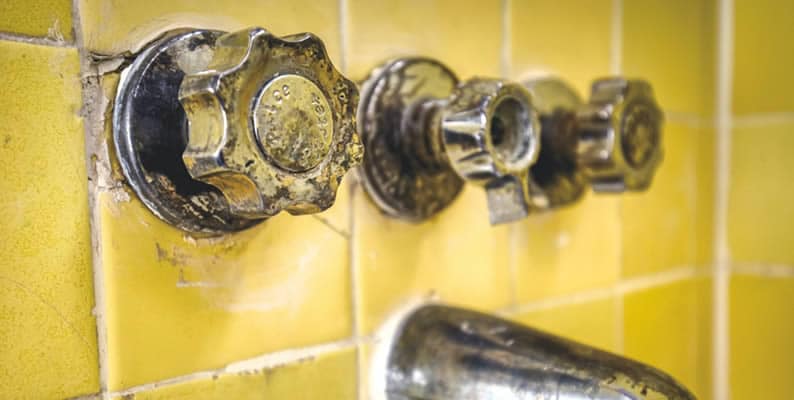
Grout is used as glue to hold your tiles in place. But these days, grout does more than just keep your tiles together; it is also used to enhance the aesthetic appeal of your home. That’s why dirty or untidy grout can affect the whole appearance of your home. Moreover, grout crumbling is quite common, especially in the bathroom and kitchen.
What Causes Grout Crumbling?
Multiple factors lead to grout crumbling. Let’s look at some of the most common causes of grout crumbling:
Low-Quality Grout
The use of low-quality grout is the main culprit which causes your grout to crumble away. Mostly, grout is cement-based. While it may be an affordable option, it becomes susceptible to damage in the long run because cement is naturally porous. Porous materials tend to absorb dirt, dust, and grime, which causes staining and makes grout crumble.
High Moisture Content
Moisture is the natural enemy of grout and one of the main causes of grout crumbling. Areas with high moisture content like the kitchen and bathroom easily become damaged and resulting in grout crumbling.
Use of Harsh Cleaning Agents
Sometimes using harsh cleaning agents can cause damage to your grout. Moreover, some of the chemicals are strong enough to even dissolve grout seals. It is important to use mild cleaning agents to clean grout.
How to Prevent Grout Crumbling?
The three major causes of grout crumbling are low-quality grout, high moisture content, and the use of harsh cleaning agents. To avoid damage to grout, you can switch to using safer cleaning agents, but the one thing that will solve all your grout problems is grout sealing.
When you get your grout sealed, it will protect your grout from dirt, dust, and debris. Moreover, your tiles and grout will become waterproof. You won’t have to worry about getting water damage or the growth of mold or mildew on your grout.
A well-sealed grout will last longer, and regular cleaning won’t affect the seal as much, but still, you should try to use mild cleaning agents.
Get Professional Help
While you can always seal grout in a DIY project, it is best to get it done by professionals for the best results. If you want a long-lasting job that prevents grout from crumbling, let the professionals take over. But keep in mind that grout sealing should be done after every 1-2 years to ensure your grout stays protected.
If you don’t know any grout sealing companies, we recommend trying out Dirty Grout. They have the best grout services that you can get at affordable prices. You can visit their website for further details.
Your best bet for grout cleaning or getting rid of stained grout is to seek help from professionals. You can try out grout cleaning services by Dirty Grout for long-term cleaning. In addition, we have a team of experts who can take care of all your grout cleaning needs.
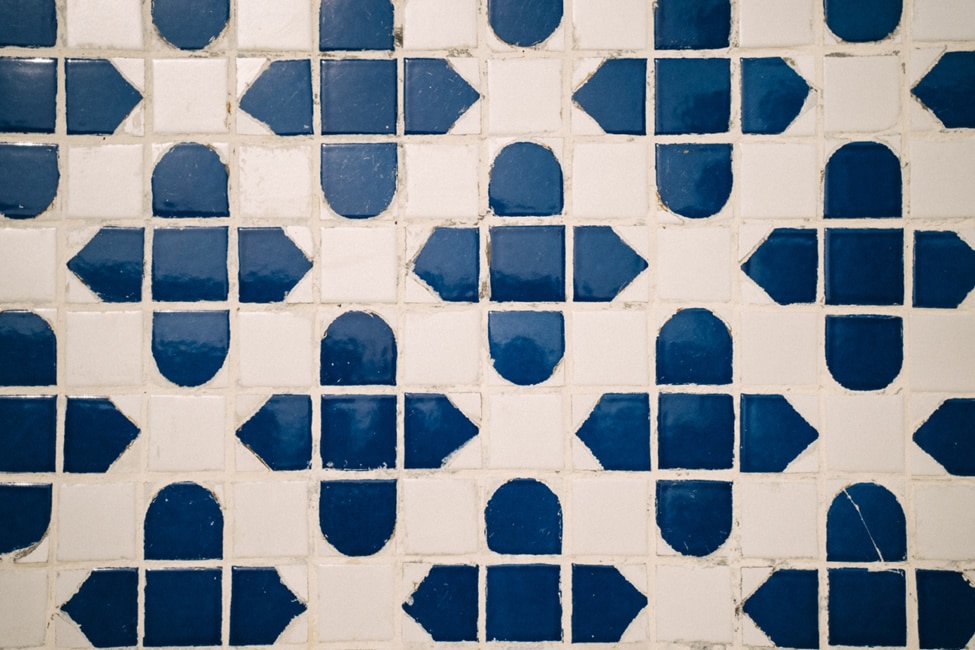
Be it your kitchen or bathroom tiles; grout is present in both. Grout is used for gluing your tiles together, however grout gets stained very easily. And in bathrooms, grout gets stained because of residual soap and water. In the kitchen, spills are the major cause of staining.
While cleaning stains from tiles is easy, sadly, the same cannot be said about grout. And stained grout can be stubborn and can make grout cleaning seem like an impossible task. But nothing is impossible, so how do you get grout cleaned?
Maintaining Grout Between Professional Cleanings
You can get your grout cleaned by using basic products that are easily available in your homes.
Here are some ways of maintaining your grout:
Use Home-Made Products
A mixture of simple products lying around in your home is enough to clean stained grout and restore the appearance of your tiles.
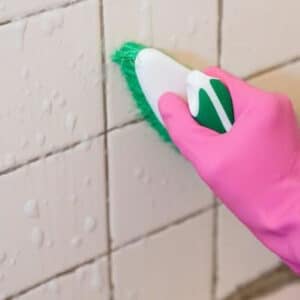
Warm Water and a Brush
This is as basic as it can get. You can clean grout stains by simply using warm water and a soft-bristled brush. Take a spray bottle and fill it up with warm water. Spray the bottle on the grout lines and scrub in circular motions. Once the water dries up, your grout stains should be gone.
Vinegar and Water
If simple water doesn’t work, you can add an equal amount of vinegar to the spray bottle. Spray equal parts of vinegar and warm water onto the grout and let it sit for 5-10 minutes. Use a brush to scrub the stains out. This method is more suited for mild stains and heavy dirt.
Baking Soda and Vinegar
Make a paste of baking soda and water and apply it to the grout. Then pour some vinegar on top, and the mixture will start to foam. Once the foaming stops, use a brush to scrub the stains and rinse them out with water.
Using Bleach
Bleach is often used to get out stains; while it may be effective, bleach can be harmful to grout in the long run. Here are the two common types of bleaches that you can use, but only as a last resort:
Oxygen Bleach
Oxygen bleach is quite effective in cleaning stained grout. But it is a strong product, so make sure when you use it the area has ventilation. After that, apply oxygen bleach solution to the grout and let it sit for 10-15 minutes. After the said time has passed, rinse out the bleach with water.
Chlorine Bleach
Chlorine bleach is very strong and should only be used in emergencies. Regular use of chlorine bleach on grout can damage it permanently. Furthermore, use a chlorine bleach spray to clean grout stains and rinse them out immediately.
When you get new tiles installed, they are held in place with “grout.” Now, what is this grout, you ask? Grout is a highly porous material used as glue to hold your tiles in place. While it’s great that your tiles stay put, the downside is grout’s high porosity. You could say that grout acts like a sponge, only it absorbs dust, dirt, grime, and debris from its surroundings. This often leads to grout stains which can affect the appearance of your tiles.
To get rid of the stains, grout cleaning is a must. But many people are concerned about whether or not grout cleaning works. Well, to answer that, if you clean your grout properly, grout cleaning works. Here are some of the best ways for grout cleaning:
Use DIY Cleaners
Rather than using harsh chemicals to clean grout, we suggest that you opt for DIY cleaners. It’s very easy to make grout cleaners with a bunch of supplies that are already sitting in your home.
Your best bet would be to use a mixture of warm water and dishwashing liquid. The mixture is effective in keeping grout clean and maintaining the appearance of your tiles. Additionally, you can also use a mixture of water and vinegar, but be sure to keep it diluted. A strong vinegar solution will end up damaging grout.
Use Steam
Steam is by far the most effective method of cleaning grout. When there’s soap residue along with dirt and dust left behind, it is not easy to get them out. The best way to clean your grout in such a condition is by using steam. Steam will loosen up any residual matter, and you can easily wipe it clean.
Get Your Grout Sealed
Grout sealing is the best way to prevent stains on grout. It makes grout cleaning easier and ensures that your tiles maintain their aesthetic appeal. There are several ways for grout sealing. You can seal your grout yourself, but we recommend seeking professional help in this case for better results.
Professional Cleaning is the best Solution
If all else fails to work, seek professional help. There are many companies out there that offer grout cleaning services. Hiring professional help will give you the best results because they know their way around things. Call Dirty Grout for a free consultation and find out how affordable it is to have your tile cleaned professionally. We have all sorts of grout-related services, including grout cleaning.
Our Final Thoughts
Grout stains are inevitable, and that’s why grout cleaning is important. Grout cleaning is a huge chore, but it must be done. Follow our tips for grout cleaning and seek professional help when needed to get the best results.
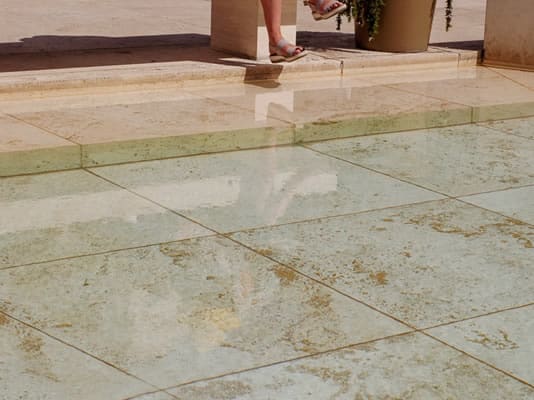
Do you want your tile floors to look shiny and streak-free but have been unable to accomplish this feat? Even if you clean tile floors regularly, the incorrect mopping technique and wrong cleaning solution can result in streaks on the surface, making your tiles look dirty and grimy.
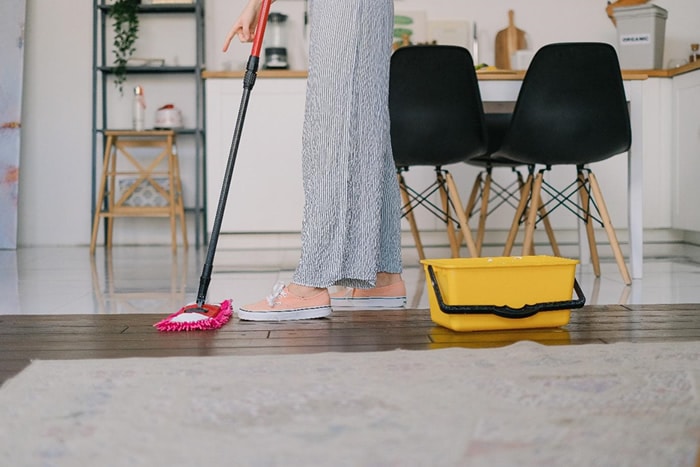
Compared to other types of floorings, tiles are durable and relatively low-maintenance. However, cleaning tile floors requires patience and the right tools. Therefore, we have put together a guide on how to get a streak-free floor that all homeowners will find quite helpful.
Image from https://unsplash.com/photos/01D-sp3AoBo
What You’ll Need
Here is all you need to clean tile floors without streaks:
Follow this step-by-step guide to ensure your floors look lustrous and flawless the next time you clean them.
Step 1: Sweep Loose Dirt
Loose dirt and debris can scratch and damage the surface of your tiles. They also increase the chances of streaks developing on the floor after you’ve mopped the area.
Therefore, it is crucial to sweep your tile floors before mopping them. Even if the floors look clean, spend a few minutes sweeping the room with a dust mop or broom. Starting from the furthest corner of your room, work your way to the entrance. Once you have reached the door, collect all the debris in a dustpan. Alternatively, you can vacuum the floors.
Step 2: Use the Right Cleaning Solution
Using the right cleaning solution is the key to streak-free tile floors. Depending on your preference, you can buy a commercial cleaner that is best for cleaning tile floors or mix ½ cup vinegar into a gallon of warm water to create a DIY cleaning solution.
Regardless of which option you choose, make sure the cleaner is not too weak or too concentrated. If it is not strong enough, you will not be able to clean tile floors properly. However, if it has a high concentration, it is likely to leave behind streaks or residue.
Step 3: Select the Right Mop
Though they may look somewhat similar, each type of mop serves a different cleaning purpose. For instance, sponge mops are ideal for cleaning spills and spots in a small area, whereas cotton string mops can clean large rooms. Similarly, spin mops can help remove stubborn stains, whereas microfiber mops are highly absorbent and an excellent option for cleaning tiles.
Both cotton string mops and microfiber mops are best for cleaning tile floors in residential settings.
Step 4: Improve Your Mopping Technique
When it comes to cleaning tiles, the mopping technique plays a huge role in developing streaks on the floor. If you are using a cotton string mop, dip it in the cleaning solution and wring out the excess liquid before cleaning the floors in a figure-eight pattern. When one side of your mop gets dirty, turn it over to the clean side. However, when both sides are dirty, make sure to wash the mop. Otherwise, you’ll only be spreading dirt around the room instead of cleaning it.
For a microfiber mop, spray a small section of the tile floor with the cleaning liquid and move the mop in an up-and-down motion. When the mop gets dirty, clean it in the sink to properly remove the dirt. Remember, using a dirty mop can also result in blotchy streaks on your tile floors.
Get Your Tile Floors Professionally Cleaned Today
If you want to restore your tile floors to their original sheen, the experts at Dirty Grout can help you. Please feel free to contact us for advice on how to clean tile floors and get your free estimate. You can also call or text at 941-457-4197 to get in touch with our team.
Do your tile floors look heavily stained and dirty? If you have already tried all cleaning tips and hacks but have still not been able to clean the grimy tiles and grout lines, it’s about time you give muriatic acid a chance. It is a slightly less potent variant of hydrochloric acid and is typically used as a last resort for cleaning tiles and grout when all other products have failed to do their job.
However, since it’s a very strong acid, you must proceed with caution.
To help you safely clean your tile floors and restore them to their former glory, we have put together a guide on using muriatic acid that you may find useful. Before we discuss the steps to cleaning tiles with this product, let’s take a quick look at what this acid does.
What is Muriatic Acid?
Muriatic acid is less pure than hydrochloric acid but still quite caustic. It is available in high concentrations in various home maintenance projects, such as cleaning concrete, metal, stones, and tiles. It is also beneficial for removing mold from different surfaces, particularly swimming pools. While extremely effective, please remember that using this acid should not be your first choice for cleaning grout and tiles. You should only use this substance if you’ve run out of options.
If not handled properly, this acid can cause a lot of damage. Since it is extremely strong, it can burn your clothes and skin. It can even eat through plastic and some metals. Moreover, the fumes from muriatic acid can be toxic and irritate your nasal passage and lungs.
How to Clean Tiles and Grout with Muriatic Acid
Here is a step-by-step guide on cleaning grout and tiles with muriatic acid.
Step 1: Make an Acid Solution
Take a bucket and fill it with one gallon of plain water. Next, slowly pour a cup of muriatic acid into the water. Make sure to put on rubber gloves and safety goggles while creating this cleaning mixture. Moreover, please do not add the acid into an empty bucket and fill it with water afterwards. Doing so can result in a vigorous chemical reaction, causing the water to boil.
Step 2: Apply Acid Solution on the Tiles
Use a paintbrush to apply the acid solution to the grout lines and tiles. Do not pour the liquid onto the floor or scrub it with a brush. Let the solution rest for a few seconds and watch out for any reaction. Refrain from leaving the tile floor unattended and keep your kids and pets away from the area. Leaving the solution on the floor for more than a few minutes may cause damage to the tiles.
Step 3: Rinse the Tiles
Once the stains get lighter and the grout lines start losing the grime, it’s time to rinse off the acid solution. You can use a bucket of clean water to wash the tiles thoroughly. Make sure to protect your skin and eyes while removing the acid solution.
Step 4: Neutralize the Acidity
Now that your tiles and grout lines look cleaner, you should neutralize the remaining acidity. For this purpose, mix a cup of ammonia into a gallon of water. You can dip a clean cloth or sponge into the solution and apply it to the tiles. Wait for a couple of minutes before rinsing the surface with clean water once again.
Please note that both muriatic acid and ammonia can erode your tiles and damage the grout if you use them too often.
Some Jobs are Better Left to the Professionals
Cleaning grout and tiles require a lot of time, patience, and elbow grease. Moreover, most homeowners are not aware of which products can be harmful to their tiles. Therefore, it is always good to get in touch with professionals for a high-quality cleaning service.
Before you resort to using muriatic acid on your tile floors, don’t hesitate to get in touch with Dirty Grout for some advice and a free estimate. Our team of experts specializes in cleaning tiles and grouts. You can also call or text at 941-457-4197.